Configure Eclipse IDE for Java Development

Developers should use the proper, available smart tools for their development environment for faster development. Eclipse java development environment provides editor to fast development and easy to debug the code. We would discuss the configuration of java eclipse development environment.
Java standard edition (SE) is freely available from the link Download Java. You can download a version based on your operating system. Download Java and run the .exe to install Java on your machine.
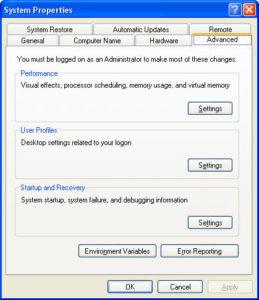
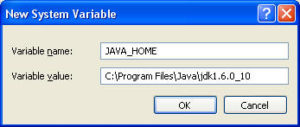
JAVA_HOME and PATH Environment Variables:
After install the Java SE, it is important to set JAVA_HOME. JAVA_HOME is a naming convention and it is required that other third party application requires to know the java installation directory. For example, set the default installation location of java and JAVA_HOME,JAVA_HOME=C:\Program Files\Java\jdk1.6.0_24.
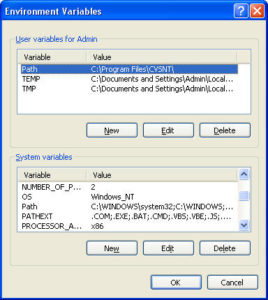
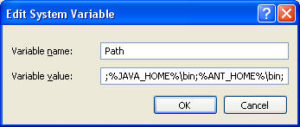
Add the java bin directory into PATH environment variables list. It specifies the directories in which executable programs* are located on the machine that can be started without knowing and typing the whole path to the file on the command line.
• The PATH is the system variable that your operating system uses to locate needed executables from the command line or Terminal window.
• The PATH system variable can be set using System Utility in control panel on Windows, or in your shell’s startup file on Linux and Solaris.
Verify the JDK version:
check the installed java and all the path variable are set properly, run “java -version” in command prompt, It should show the installed the java version as below.
C:\Users\admin>java -version (Press Enter)
java version “1.8.0_131”
Java(TM) SE Runtime Environment (build 1.8.0_131-b11)
Java HotSpot(TM) 64-Bit Server VM (build 25.131-b11, mixed mode)
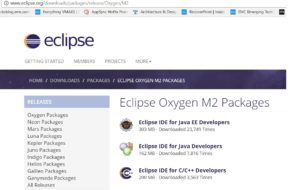
Eclipse Download:
Download eclipse for java developers and extract the zip folder. Click the application eclipse.exe in that folder. Before that confirm that the required JDK installed in the machine for the eclipse version and JAVA_HOME variable is set. For instance, the latest Eclipse Oxygen required JDK 8.
On the windows platform, if you extracted the contents of the zip file, can start eclipse by using <extracted folder>\eclipse.exe
In Eclipse, all the program and related data will be stored in the workspace folder. When eclipse starts up for the first time it prompts you for the location of the workspace folder. We can customize the folder location or just click the default location suggested by Eclipse.
Create Java Project :
We can create different type of project in Eclipse based on the project type. Initially we start with java project for learning java.
By clicking on the File menu and choosing New →Java Project.
- Enter the Project Name
- Select the Java Runtime Environment (JRE) or leave it at the default
- Click finish.
Create Java files in Java Project:
- By clicking on the File menu and selecting New → Class.
- Enter the package name(optional) and class name. For example “HelloWorld”.
- Click finish.
Test the development environment:
We write first program to print the “Hello, World” to check our JDK and Eclipse development environment is configured properly.
public class HelloWorld {
public static void main(String[] args) {
// Prints “Hello, World” in the terminal window.
System.out.println(“Hello, World”);
}
}
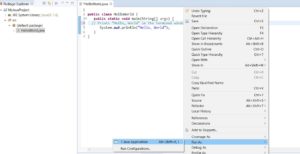
Run the HelloWorld and it would print “Hello, World” in console window. Now development environment is configured and start coding.!! Learn Eclipse shortkeys for debugging and development.